
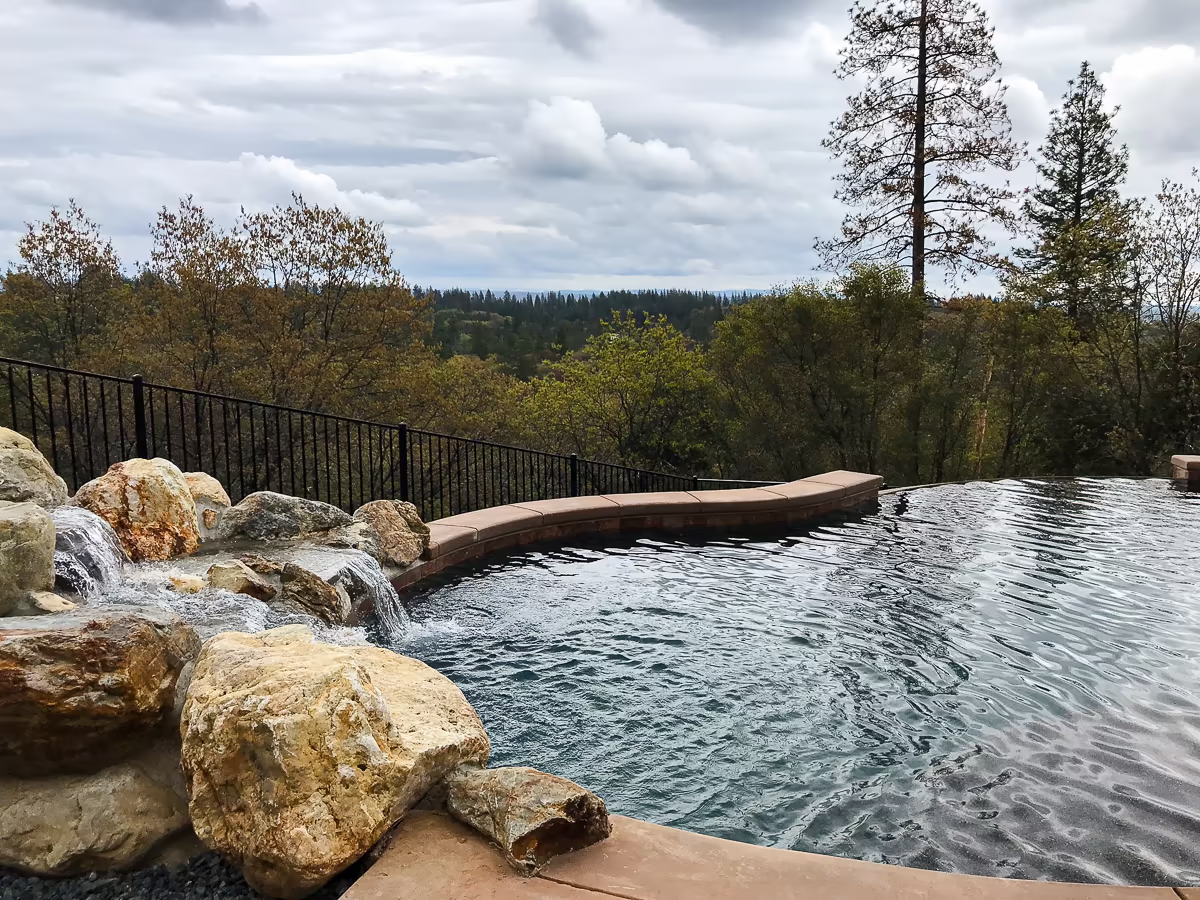
This is the fifth and final post in the Colfax Vanishing Edge Pool construction series. In this post I cover the complete equipment set, the dark pebble plaster pool finish, fill, startup chemistry, and the Placer County final inspection that closed out the project. If you’re joining mid-series, start with Post 1: Site Engineering and Hillside Design.
Equipment Set for a Pebble Plaster Pool
After the decks were poured, we waited about a week before the crews walked on the newly placed concrete. That curing time matters — the slab needs to be hard enough to handle foot traffic without damage. Once it was ready, the equipment set crew moved in. The pool equipment distributor had already delivered and staged everything near the pool. On this job, I specified Pentair equipment throughout — a brand I rely on for its rugged durability and legendary variable speed pump technology.
Vanishing Edge Pump
The vanishing edge water flow is a defining feature of this pool, and getting it right required a dedicated pump. I specified a 3-horsepower variable speed pump exclusively for the vanishing edge weir. A variable speed pump gives the homeowner a full range of flow options — from a soft, tranquil, meditative flow that just wets the tile face, all the way up to a loud, rushing river sound that breaks boldly over the wall. That flexibility is something a single-speed pump simply cannot deliver.
Pool Filtration
For the pool filtration system, I specified a second dedicated 3-horsepower variable speed pump paired with a 520-square-foot Pentair Clean and Clear cartridge filter. For an 18,000-gallon pool with a 1,000-gallon catch pool on a remote, dusty hillside property, I intentionally oversized the filter. Out here, dust and debris load the water in ways that a suburban pool never sees. A larger filter runs longer between cleanings and keeps the water consistently clear. When you need that extra capacity, you’ll be glad it’s there.
Automation: Pentair IntelliCenter Pool Control
For automation, I specified the Pentair IntelliCenter control system. The IntelliCenter manages all of the pool’s functions from a single interface — variable speed settings for both pumps, lighting, and the full sanitation system. With a tap on his phone or remote, the homeowner can turn on the lights, adjust the vanishing edge flow speed, or check his water chemistry without ever walking down to the equipment pad. On a hillside property where the equipment sits some distance from the house, that kind of remote access isn’t a luxury — it’s genuinely practical.
Sanitation: Automated Pool Water Chemistry
California pools sanitize best with chlorine. I realize there are other options, but given California’s climate and the bathing loads typical of in-ground gunite pools, chlorine remains the right choice when applied correctly. On this project, I set the sanitation system up to be as automated as possible, specifying two Pentair components: an IntelliChlor salt chlorine generator and an IntelliChem automated pH and ORP controller.
I’ll be honest — this system is sophisticated, and your service professional needs to be familiar with it. But here’s why it’s worth it. The IntelliChem adds liquid muriatic acid in small, metered doses and delivers chlorine continuously at a controlled rate. Compare that to a weekly service visit where a technician dumps in acid and chlorine all at once. Those one-time additions create spikes — temporary swings in chemistry that cause eye irritation and that harsh, over-chlorinated feeling that puts people off swimming.
By contrast, the IntelliChem keeps the chemistry on even, gradual curves with no spikes. As a result, the water feels dramatically better. You can even reduce chlorine levels significantly when the pH stays consistently balanced. Is there a learning curve? Yes. Is it worth it? Absolutely — because the whole point of a pool is how the water feels, and a well-balanced pool is a genuinely enjoyable experience.
Heating and Solar Stub-Out
The homeowner didn’t want a propane gas heater, but we planned ahead for the future. We stubbed out two 2-inch Schedule 40 pipes and one ¾-inch electrical conduit from the equipment area, specifically for a solar pool heating system, whenever the owner decides to install it. That’s the kind of detail that costs almost nothing during construction and saves a significant amount of work later.
Above-Ground Spa
Rather than an in-ground spa, the owner opted for an above-ground spa unit. We supplied a dedicated 60-amp, 220-volt power circuit for it. As far as aesthetics go, I’ll be honest — I’m not a big fan of above-ground spas from a design standpoint. However, from a practical standpoint, they have real advantages: they’re energy-efficient, they’re always at temperature, and they’re ready to use whenever you are. And that was exactly what this homeowner wanted. The idea of stepping into a warm spa and looking out over that vanishing edge at the Sierra foothills view? I can’t argue with that.
Pool Lighting for a Dark Plaster Interior
The equipment crew installed and wired all pool equipment in the pool house structure. The pool received one 120V Pentair IntelliBrite 5G color LED light in the main pool, and four 15W 12V GloBrite color LED lights — two at the step locations in the main pool and two in the catch pool for a dramatic nighttime effect. LED color lighting in a dark pebble plaster pool is something special. At night, the main pool comes alive with shifting LED color, while the catch pool creates rhythmic ripple-pattern shadows on the tile face that genuinely captivate your attention.
Planning a hillside pool in Colfax, Auburn, or the Sierra foothills?
Schedule a complimentary site consultation or call (916) 624-5296.
Fencing and the Pre-Plaster Inspection
Once the equipment was in place, the owner installed the required fencing per Placer County barrier code requirements. On a remote hillside site like this one, wildlife is a real consideration. I regularly saw herds of deer near the pool during site visits. Once, I spotted a mountain lion paw print in the soil — I recognized it immediately by the size and the unmistakable M-shaped pad impression it leaves. The fence went as tight to the pool as practically possible to minimize the open perimeter. Thinking about it now, the fence may have been as much about protecting the bathers from local wildlife as it was about meeting code.
Once the fence was installed and code-compliant, we scheduled the Pre-Plaster Inspection with Placer County. It passed shortly after the fence was completed. With that sign-off in hand, we had the green light to schedule the plaster crew.
The Dark Pebble Plaster Pool Finish
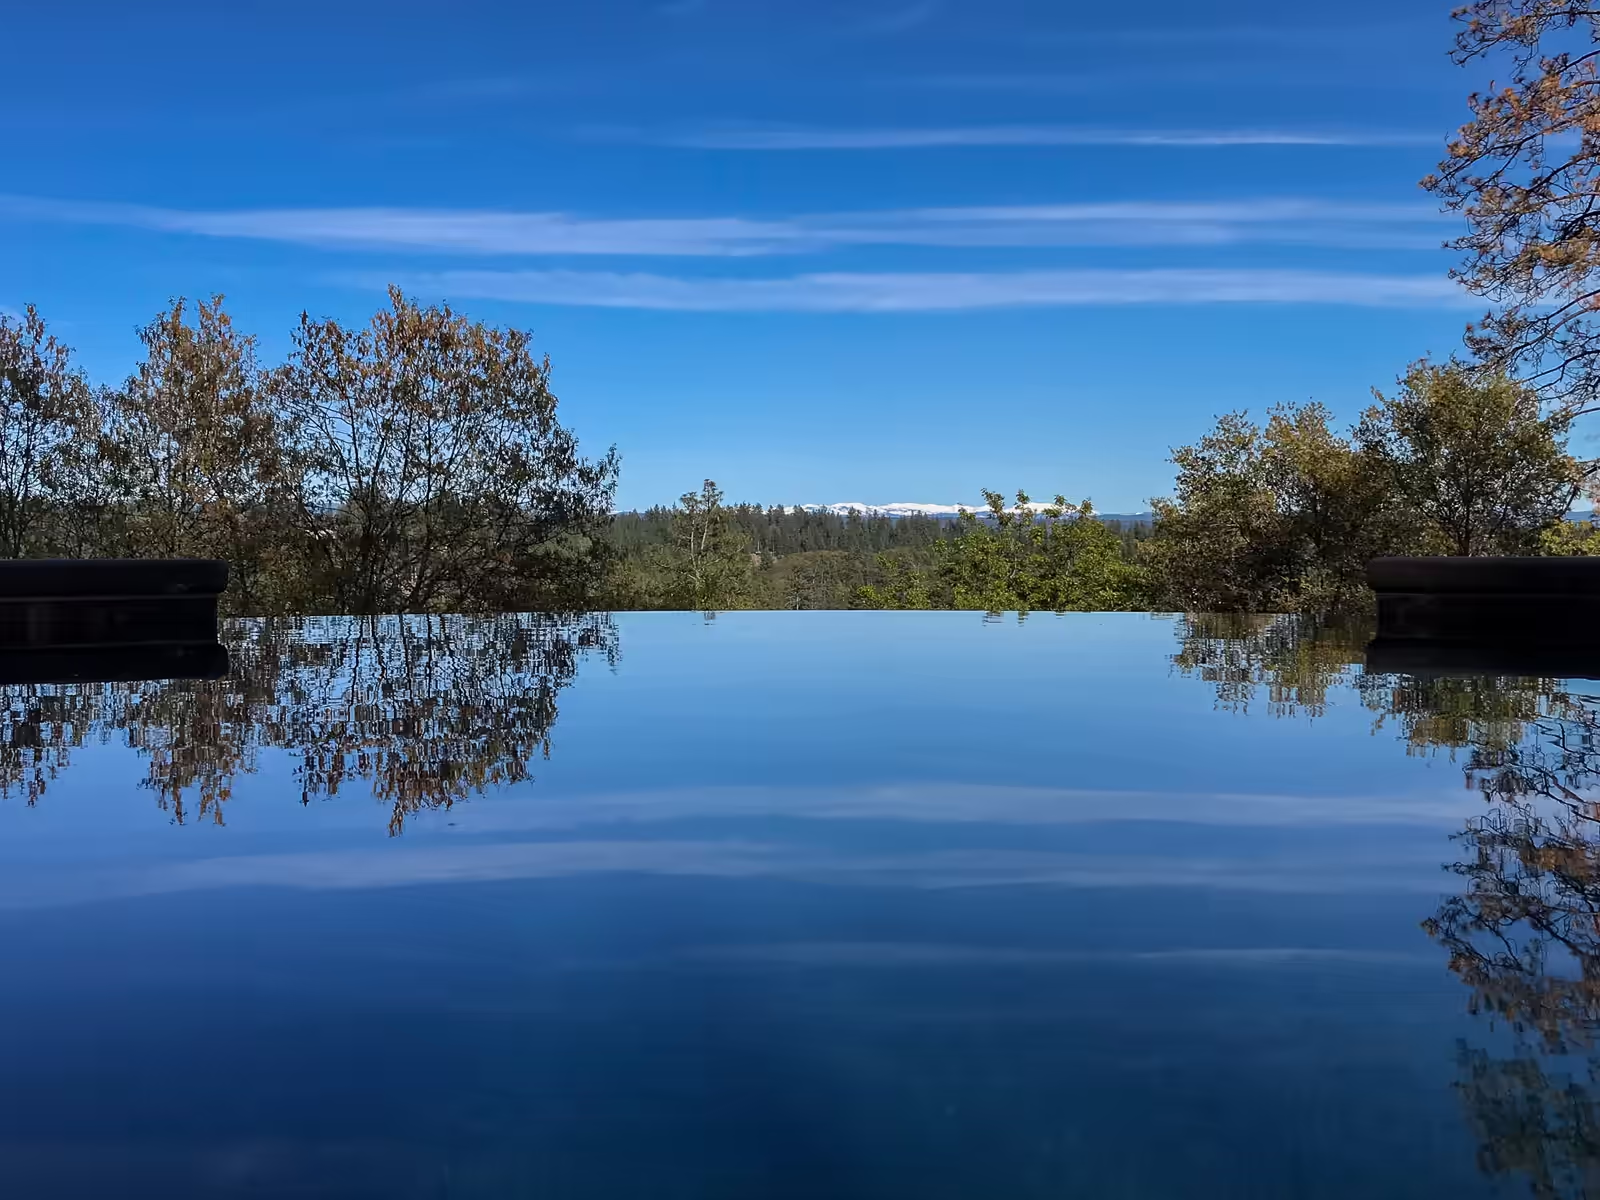
The pebble plaster pool finish we chose is a proprietary blend of very small aggregate mixed with cement and a black colored oxide to produce a dark interior. A dark bottom is the right choice for a vanishing edge pool. It turns the water surface into a mirror, reflecting whatever is in the sky above it. On a clear day you see the clouds, the trees, the mountains. It’s genuinely awe-inspiring, and it’s exactly what a vanishing edge pool should do.
Preparing the Shell for the Pebble Plaster Finish
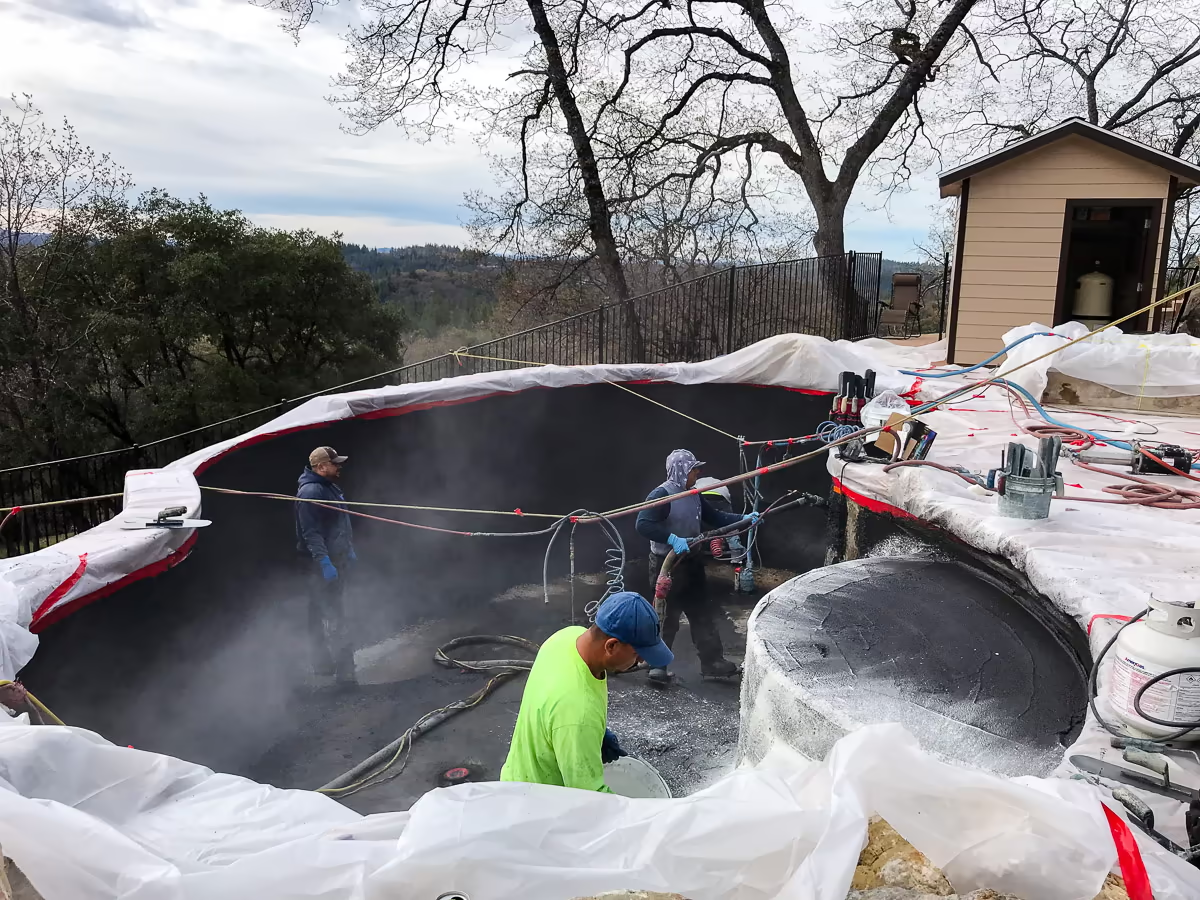
Before the crew arrived, we thoroughly prepped the pool shell. Specifically, we scraped out months of construction debris, leaves, and dust, cleaning down to bare gunite so the pebble plaster pool finish would bond properly to the shell.
Applying the Pebble Plaster Pool Finish
The pebble plaster process is intricate — it takes a skilled crew with everyone executing a specialized role simultaneously. The mixer man blends the proprietary mix of aggregate, colored oxide cement, and special additives with precisely the right amount of water. He pumps that mix through a hose, and the crew sprays it onto the gunite shell. Crew members immediately follow behind with trowels, working the material into the surface. The whole crew moves in concert, walking on spiked shoes that let them step across fresh material without damaging it.
There’s a distinct sound to a pool being plastered — the sputtering of the plaster gun, the clacking of spiked shoes, and the scraping of trowels as the crew shapes the interior surface. It’s almost like watching a team frost a giant cake.
Exposing the Pebble Aggregate Surface
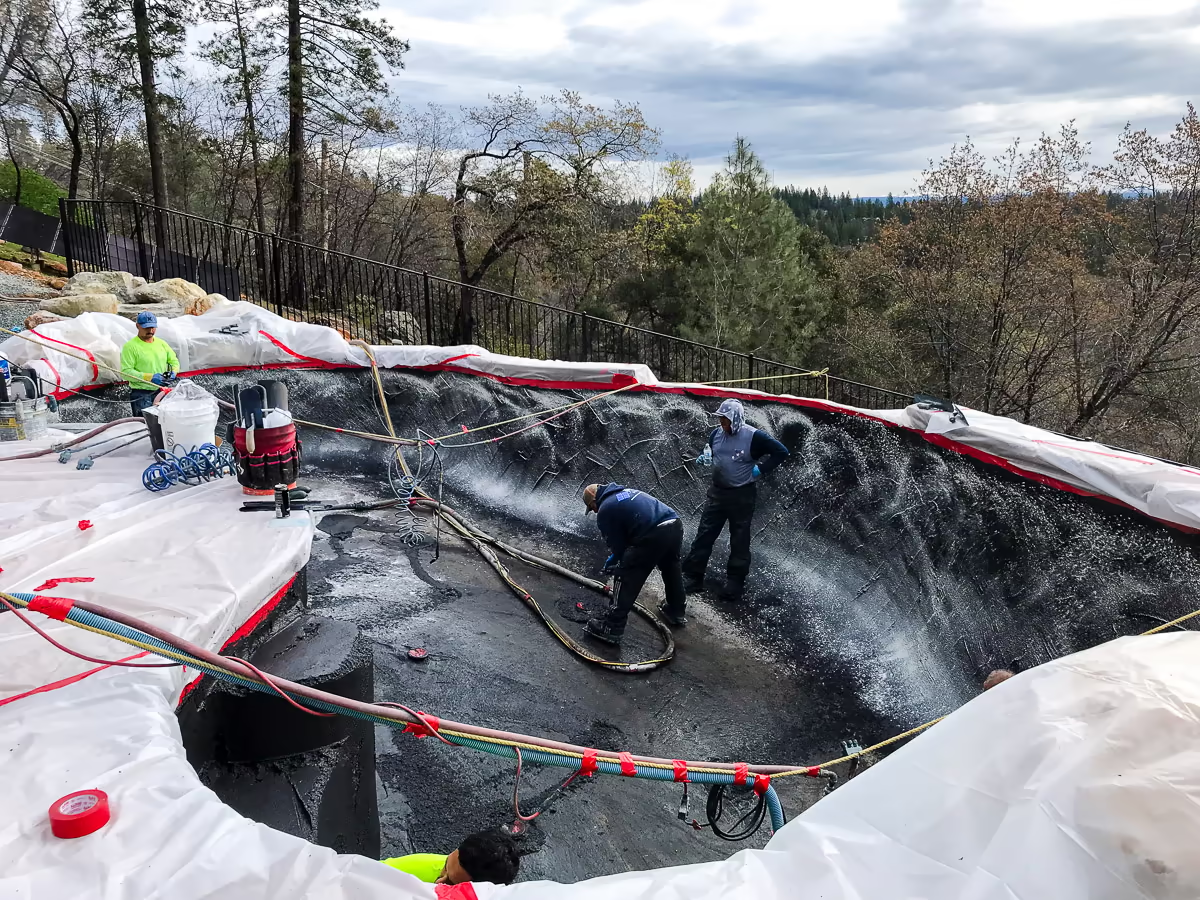
As the plaster stiffens, the crew transitions from spiked shoes to sponges for the final finish work. Once the surface reaches the right hardness, they expose the millions of aggregate pebbles by passing a high-pressure water wand across the entire interior. Timing is everything: spray too early, and you wash out the plaster; wait too long, and the pebbles won’t expose properly. Hit it just right and you get a smooth, even surface with every pebble fully revealed.
The exposure process generates a cement slurry that the crew continuously pumps out. A pump runs from the lowest point of the pool into a temporary holding tank on the deck. Once the slurry hardens, the crew removes it and hauls it off — no trace left behind.
Day Two: Acid Wash and Pebble Plaster Finish
Pebble plaster is a two-day process. On day two, the crew returns for a light acid wash that etches the latent cement film and makes the pebbles shine. Additionally, they lightly sand the interior with a specialized disc to buff the pebble plaster finish to a smooth, even surface.
Fill and Startup
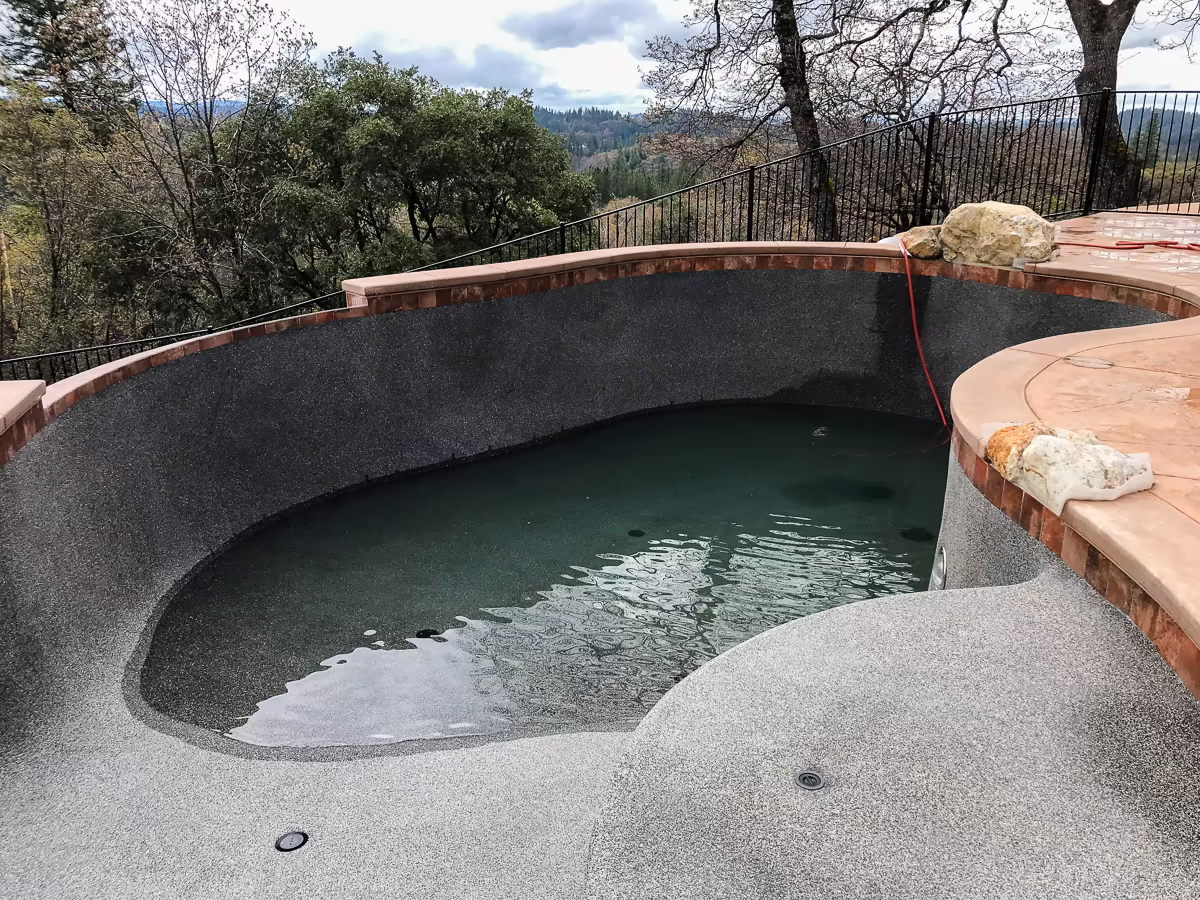
Once the crew completed the final finish work, the hose went in and filling began. It’s important to keep the water running continuously until the pool is completely full. If you stop mid-fill, a ring or waterline mark can form on the plastered wall that is very difficult to remove.
The main pool filled first, then the catch pool. Watching the water rise in a freshly plastered pool never gets old. Water is the missing ingredient — the one element that completes the transformation and makes the entire project suddenly make sense.
First Water Over the Vanishing Edge
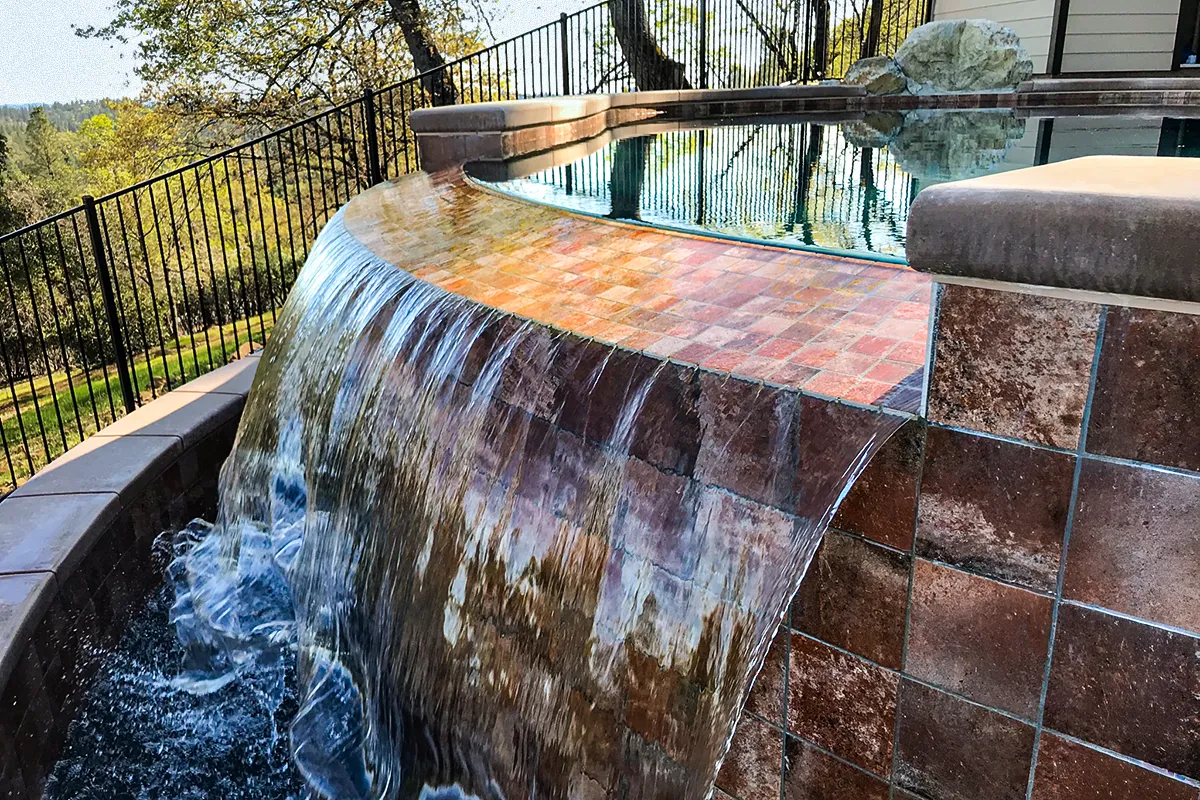
Once the pool was full, the startup crew commissioned the equipment for the very first time. As the pumps primed, air bubbled up from the return lines as the circulation system came to life. Then came the moment I’d been waiting for since the excavator first broke ground — the water reached the vanishing edge and began spilling over for the first time. It never gets less exciting. Everyone on site stops and watches.
Startup Chemistry and Pebble Plaster Pool Finish Curing
The startup crew carefully added the required startup chemicals and walked the homeowner through the brushing protocol. New plaster needs daily brushing for approximately two weeks. The brushing keeps calcium in suspension as it leaches out of the cement, preventing it from staining the fresh surface.
Over the following month, the startup crew balanced the pool water chemistry in a sequenced process — adjusting calcium hardness, pH, and minerals introduced by the fill water. The pool was swim-ready in approximately two weeks. Furthermore, the automatic pool cleaner goes in after about one month, once the interior finish has fully cured. Once the startup crew manually balances the pool water, the IntelliChem automation and IntelliChlor systems take over. New plaster is still curing during the first month. Consequently, brushing and careful water balance during this period are critical to protect the pebble plaster pool finish and allow the surface to harden evenly.
Final Inspection and Project Completion
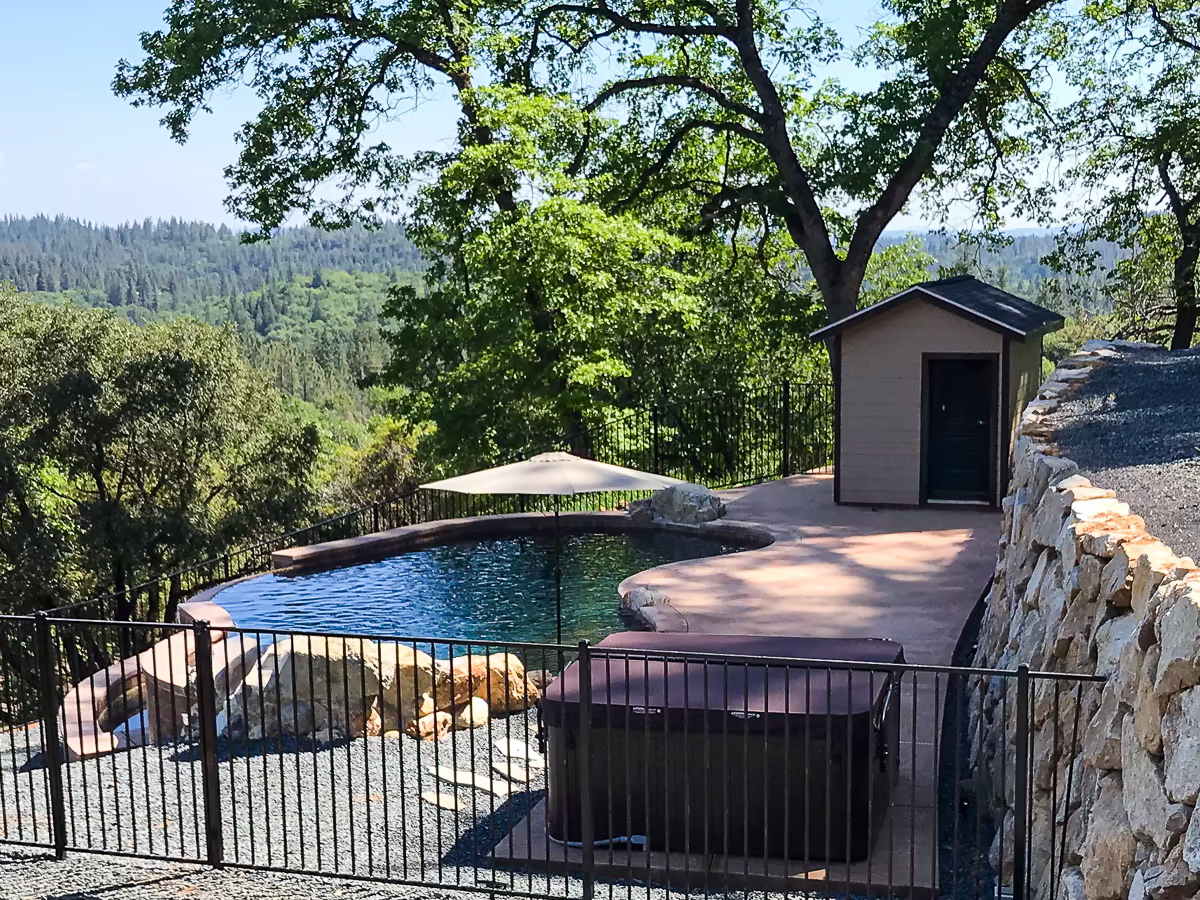
There was one final step: the Placer County final inspection. The inspector verified that all construction details and fencing were in place and compliant. The county signed off, and the project was officially complete.
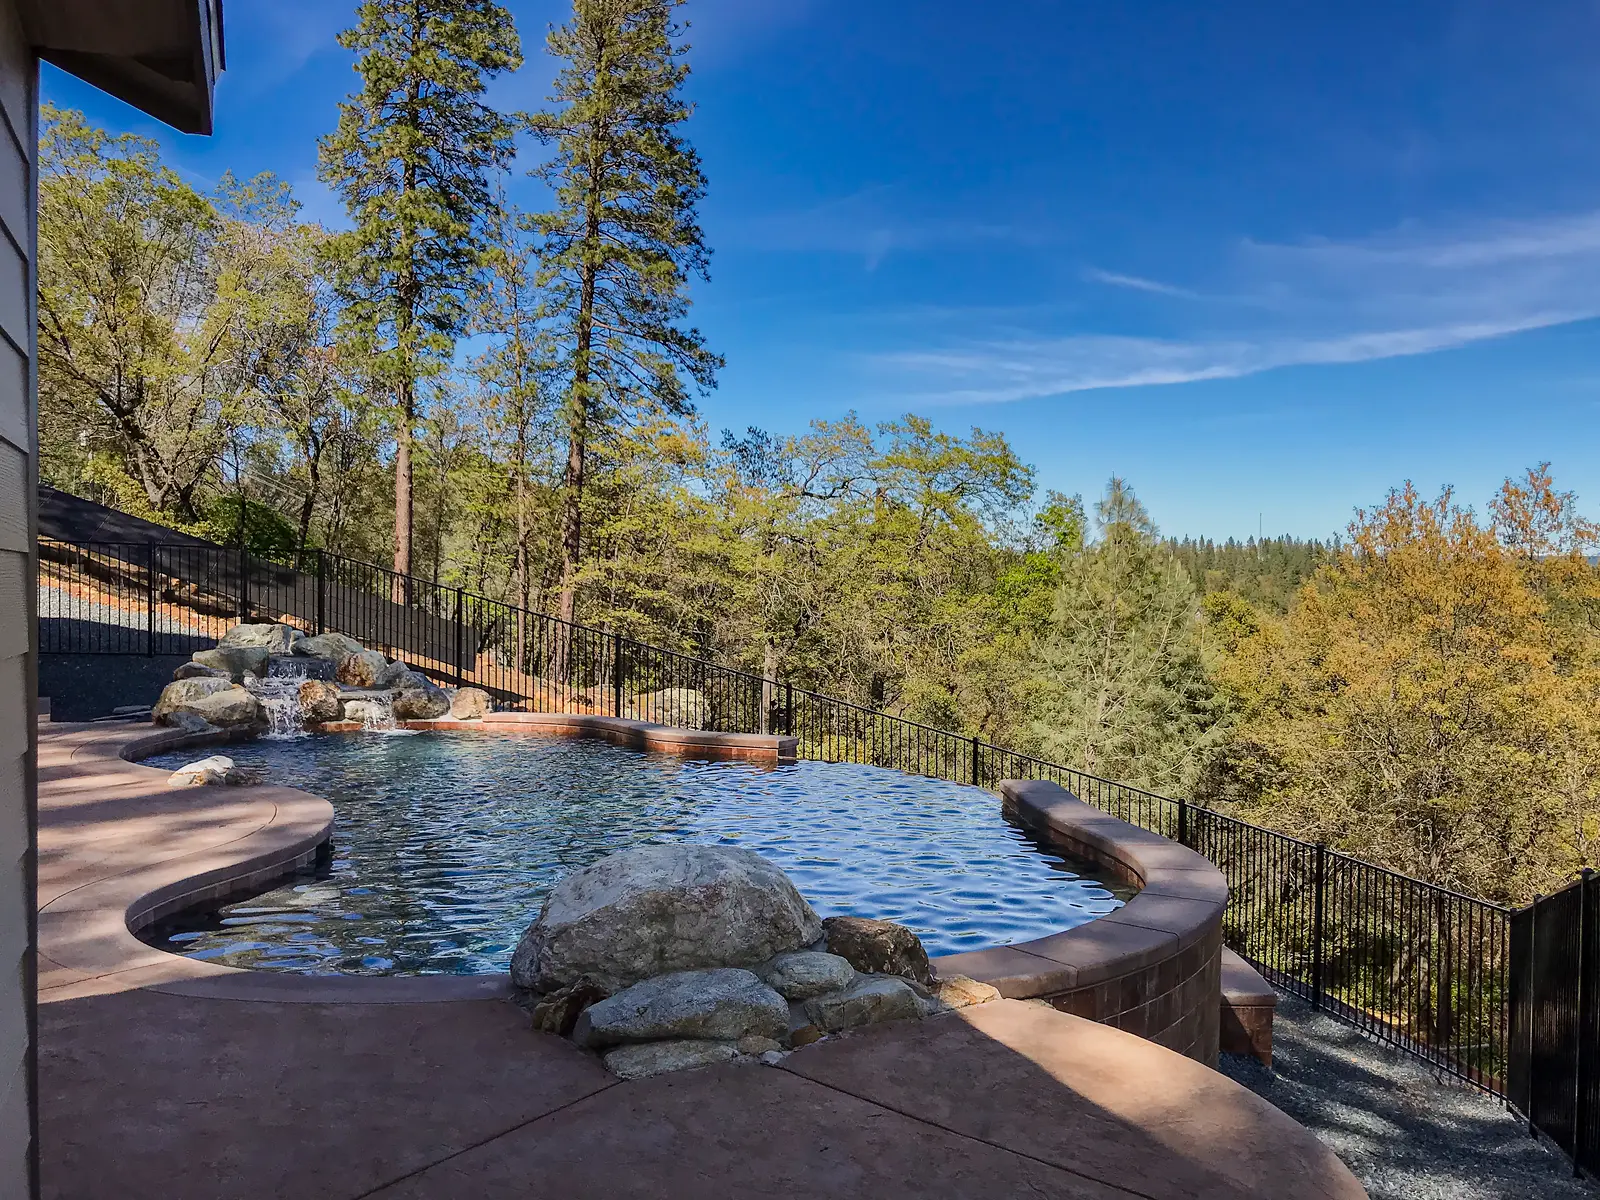
I was proud and satisfied with how this pool turned out. A challenging hillside site, a true vanishing edge, a Sierra boulder waterfall, a dark pebble plaster pool finish, and a view that earns every bit of the effort it took to build it.
Looking Back on the Series
As I’ve been writing this series, I’ve thought back on all of it — what an adventure this project was. I remember when the site was still quiet and the house was just framed. Looking out through the framed windows, I imagined what would be there. The view was already majestic. I spent a lot of time on that slope figuring out how to build this project.
Indeed, one of the thoughts I kept coming back to was just how much it takes to make water flow over a vanishing edge tiled wall — the men, the machinery, the materials, the engineering, and the planning. Every crew performed with excellence. If you’ve read this series, I want to thank you for taking the time. I’ve genuinely enjoyed writing it.
If Your Property Presents a Challenge
If you’re thinking about building a pool and your property presents a challenge, I want you to know — I’m up for it. Creating a beautiful swimming pool that your family will enjoy for many years takes perseverance, a strong will to achieve, and an excellent team. That’s what I’ve been doing for the past 35 years.
I also want to say that when each project is completed, I’m always a little sad. I miss the daily site visits, the conversations with the clients, and working through all of the phases together. Over the months of construction I build a genuine rapport with my clients, and I’ve cherished every one of those relationships.
But I’m only sad for a little while — then I’m off to the next project and the whole process begins again.
When this project was finished, I wished the homeowner happy swimming. Later, he wrote a five-star review:
“Jim is great to work with. On time with his work and communications. I would recommend him to anyone for their pool project.”
Planning a hillside pool in Colfax, Auburn, or the Sierra foothills?
Schedule a complimentary site consultation or call (916) 624-5296.
Colfax Vanishing Edge Pool Series
Post 1: Vanishing Edge Pool Colfax — Building on a Steep Hillside
Post 2: Vanishing Edge Pool Construction — Colfax Project Takes Shape
Post 3: Gunite Pool Construction — The Shell Takes Shape
Post 4: Tile, Waterfall and Deck — Colfax Vanishing Edge Pool
Post 5: Equipment, Pebble Plaster and Startup — Colfax Vanishing Edge Pool
About Jim Chandler Pools
Jim Chandler Pools has built custom gunite swimming pools for more than 35 years throughout the Greater Sacramento region and Sierra foothills. The firm specializes in hillside construction and engineered vanishing edge pools.
As a second-generation pool builder, I bring deep technical knowledge to every project. I previously served as a paid Swimming Pool (C-53) Subject Matter Expert panelist for the California Contractors State License Board (2012–2017). That experience strengthened my understanding of engineering standards and regulatory compliance.
I focus on challenging sites where others hesitate. Hillside construction is my specialty. Complex structural conditions are my expertise. Projects requiring more than standard construction are where I do my best work.
Serving Sacramento, Rocklin, Granite Bay, Auburn, Grass Valley, Colfax, Folsom, and El Dorado Hills.